


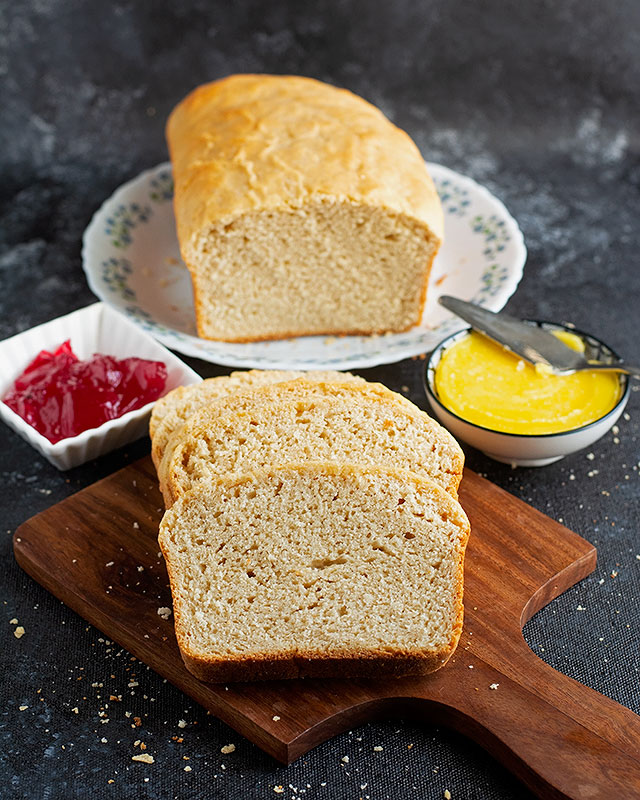
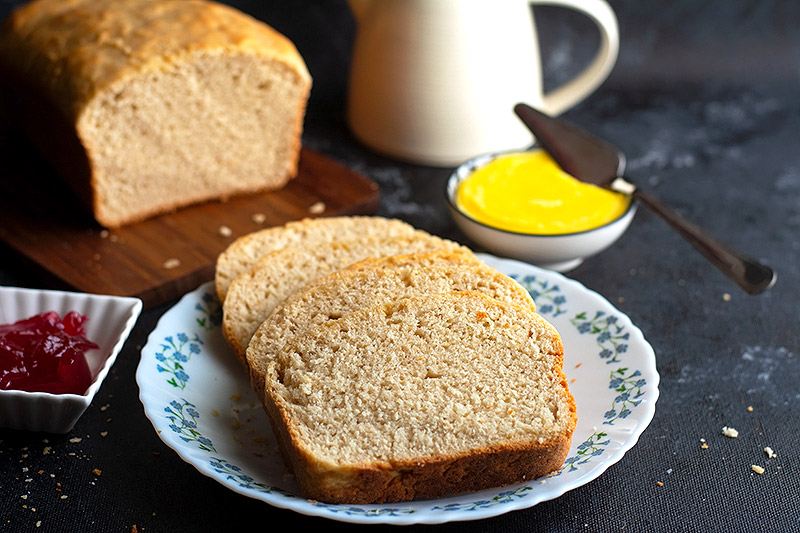
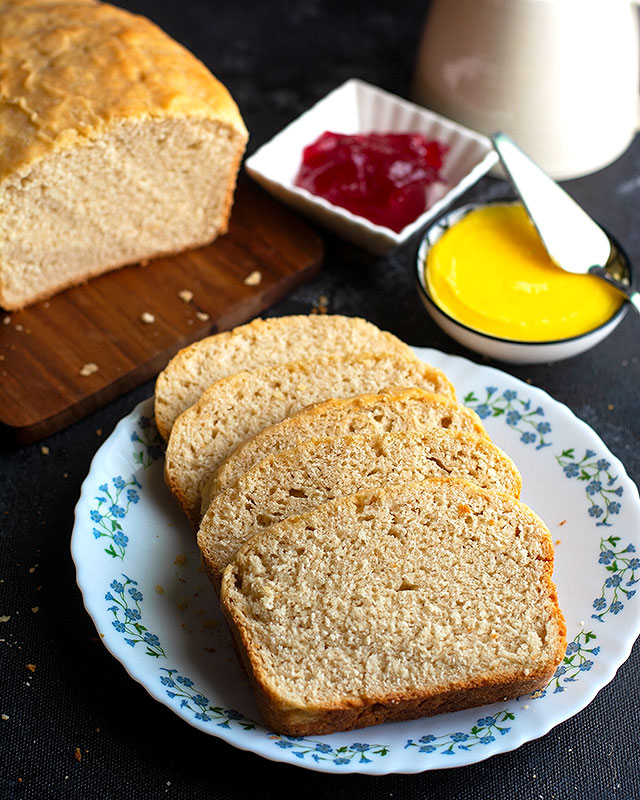
No Knead Sandwich Bread Recipe. An eggless no knead bread that is so soft, crusty & with lots of crumbs using 50% each of whole wheat flour and all purpose flour.
100% no kneading necessary, this bread gets done in just 2 hours from start to finish.
Using 50% each of both the flour gives the finished bread a nutty aroma.
When toasted, the aroma is enticing, the slices brown good all over uniformly and also the taste is enhanced upon toasting, making it slightly chewy as well.
Growing up my mom’s neighbour, Hannah Aunty used to bake this bread and the heavenly aroma used to entice me a lot.
She was the only one who had an oven in our entire neighbourhood as well and we all looked forward to her bakes whenever she baked.
Our Favorite Video:
When I was toasting a slice of store bought bread day on Saturday for the boys breakfast, I got so nostalgic about this humble bread that I used to eat baked by her.
She would toast it with lots of butter and a good dose of Kissan jam would be applied on it. No other warm treat could be compared to that.
And that nostalgic memory also reminded me that it has been more than 3 years since I baked a bread using yeast.
Ever since I started travelling down the Sourdough path, all the breads were slow baked sourdough breads like the recent Sourdough Focaccia.
So I decided to bake this no knead sandwich bread the next day itself and got ready with the ingredients on this fine Sunday morning.
The dough for this bread is not wet and unmanageable like other no knead breads but very easy to manage, shape and bake.
You can also check out this 5 min no knead artisan bread that is so easy.
If you are new to baking, especially breads, this no knead bread will be a great start as it is very forthright and simple that gives great result every single time.
Which yeast did I use?
I used instant yeast but you can also use active dry yeast. If using instant yeast, no need to proof or activate it. You can add it directly to the flour and start making the dough.
But since I had bought the instant yeast in bulk and had stored it in the freezer which I had not used in the past 3 years. So, I proofed it to check whether it was still active and kicking.
If using active dry yeast, you need to proof it first before adding it to the flour. I have shared how it had to be done in the recipe below.

How to set up a warm environment for bread rising:
The temperature in every kitchen will vary depending on the weather.
So the rising time of the bread will also vary every single time depending on the season.
So I follow this procedure as the timing is always consistent irrespective of the outside temperature and also it takes considerably less time for the rise.
This also means the bread gets done in less time as well.
This is what I do for both the rises,
If you have a microwave:
Take 1 cup water in a microwave safe bowl, heat it for 1 to 1-1/2 min.
Push the bowl to a corner and place the bowl or tray (covered on both occasions) in the microwave and close it immediately.
Switch off and let it be for the time mentioned for the rise.
If you have an OTG:
Place a plate or tray at the bottom (floor) of the oven.
Fill upto half with hot water and immediately close the door. Wait for 1 or 2 mins for the steam to build up.
Open the door, place the bowl or tray (covered on both occasions) on the rack above the water filled bowl and close it immediately.
Let it sit for the time specified for the rise. Remove the water filled plate or tray before preheating and baking.
As I have a microwave, I did both the rises in it.
Following this method not only reduces the rising time by half but also prevents the top layer of the bread from drying out keeping it moist and soft after baking is done.
Can I bake using 100% whole wheat flour or vice versa?
You can bake with 100% whole wheat flour but the resulting bread will be highly dense and very chewy making your jaw ache. You also cannot expect the bread to rise too much.
If you choose to bake the bread with 100% all purpose flour, then the bread will have a milky hue and very very soft but due to the lack of protein content the nutty aroma and the taste will be lacking.
How to store this no knead bread?
It is best when eaten warm. But if you wish to store, it can be done for a day or 2 at room temperature.
Beyond that it will become dry as there are no additives to keep it as such.
I wrap it up in a cotton cloth & keep it on the counter and use it within a day or 2.
If I wish to store it more than that, I slice the bread into thick slices and freeze them.
When I want to use it, I take it out, wrap them in a kitchen paper and microwave for 30 secs at high and the slices become soft, pliant and ready to use.
No Knead Sandwich Bread Recipe details as follows:

No Knead Sandwich Bread Recipe
Ingredients
- Whole wheat flour - 200 gms or 1-1/2 cups approx
- All purpose flour - 200 gms or 1-1/2 cups approx
- Water - 250 ml or 1 cup
- Active dry yeast or Instant yeast - 2 tsp
- Sugar - 1 tsp
- Salt - 1 tsp
- Vegetable oil or melted butter - 4 tsp + 1 tsp
- Butter - 2 tsp for greasing & smearing on bread top
Instructions
Preparation:
- Prepare a bread tin (9 x 5 x 3 inches) by greasing the insides with butter and set it aside till use.
Proof / activate the yeast:
- Heat water till it is lukewarm (40 deg c)
- Add sugar and stir till it dissolves.
- Add yeast, whichever you are using and stir well once again. (see post above)
- Leave it undisturbed for 10 to 15 mins.
- If the yeast is active, it will turn frothy on top. Set aside.
Make the bread dough:
- Measure both the flours using either a kitchen scale or cups into a wide bowl.
- Make a well at the centre and dump the yeast mixture into the bowl. Make sure to get all the froth sticking to the sides into the bowl.
- Drizzle oil or melted butter on top.
- Using a spatula, mix it together till everything comes together.
- Using your hands, mix into a soft and pliant dough. No need to knead.
- Lift the dough and add in remaining 1 tsp oil. Smear the sides of the bowl and coat the dough ball with oil.
Prepare for first rise:
- Cover the bowl with either cloth or a shower cap and leave it in a warm place (see post above for procedure).
- The dough should double up in volume.
- This should take more than 1 hour at room temperature but since I followed the above mentioned procedure it took me only 40 mins but I left it for 1 hour.
Prepare for second rise:
- Flour any dry surface or your kitchen counter and drop the dough on it.
- Deflate the dough by punching and pushing to release all the air from the dough.
- Pull the dough from all the sides and bring it to the centre and make a log by rolling it.
- Place the log into the greased tin and cover the top with a cloth.
- Place it a warm place (see post above for procedure) and let it rise once again.
- As I followed the above mentioned procedure, it took the dough just 30 mins to rise an inch or 2 above the rim of the tray.
- If done at room temperature this should take anywhere between 1 to 1-1/2 hours.
Bake the bread:
- When there is 10 mins left of the second rise, preheat the oven at 190 deg C for those 10 mins.
- Take the cloth off the pan and bake for 30 mins.
- The top would have slightly browned or changed color.
- Remove and let it cool on a rack. Slice the bread using a serrated knife.
- No knead sandwich bread is ready to be toasted or made into any of your favorite sandwich.
Notes

Leave a Reply