Sourdough Starter recipe with step wise photos documenting each day’s progress. This process is apt for the climate of India and suitable for Indian Kitchen.
Making your sourdough starter at home is very easy, quite simple and so very rewarding.
Ever since I started baking breads, developing my own sourdough starter has been a dream. I read through many sites and though the entire process is very simple, the comments in the sites made me hesitate.
There were many failures than success stories and there was a definite information overload. The more I read, the more I got confused (despite the process being simple ie.,).
At the beginning of this year I decided to overcome my hesitation and decided to try my hand at making my own starter. The recipe that I decided to follow is from King Arthur Flour. The measurements and observations are my own.

Sourdough is nothing but fermented dough without adding any yeast. You basically need only 3 ingredients. Its almost like our very own idli and dosa batter, where the consistency is more like vada batter. Its that simple and will continue to remain simple if you do not build it up into anything more.
Most of the sites documenting sourdough are from the U.S, U.K and Europe where the climatic conditions are very cold than when compared to tropical climate like India. So before going ahead it is more important to rely only on your judgement than what they would have said in their sites.
The following is based on my own understanding, observations and what I did. The temperature during the week was 35 C to 39 C during day and 29 C to 32 C at night. I just left the jar on kitchen counter and the kitchen was left dark at night.

The basic 4 steps of sourdough starter process:
Mix:
Mixing flour with water and stirring briskly till you do not see any dry patches of flour left.
Rest:
Resting the mixed dough ranging from 24 hours for first 2 days and for 12 hours from then on.
Discard:
Removing a part of the dough and discarding to maintain the ph level and for the fermenting to take place quickly. These discarded starters are also called as unfed starters.
By discard you can literally discard it which is throw it away. But since its waste of ingredients, you can give it away to your friend to start their own starter or use it many recipes that call for unfed sourdough starter. If you are an avid bread baker, have many starters going on at the same time using the discarded starter.
Feed:
Feeding or adding more all purpose flour and water once on the second day and twice from the third day on.
Measuring Instruments:
While a measuring scale was suggested, I did not want to go into mathematical calculations for a simple thing. The volumes in ounces, ml,gms were all quite consuming. So I decided to keep it simple. All you need are your measuring cups and a clean spoon for stirring.
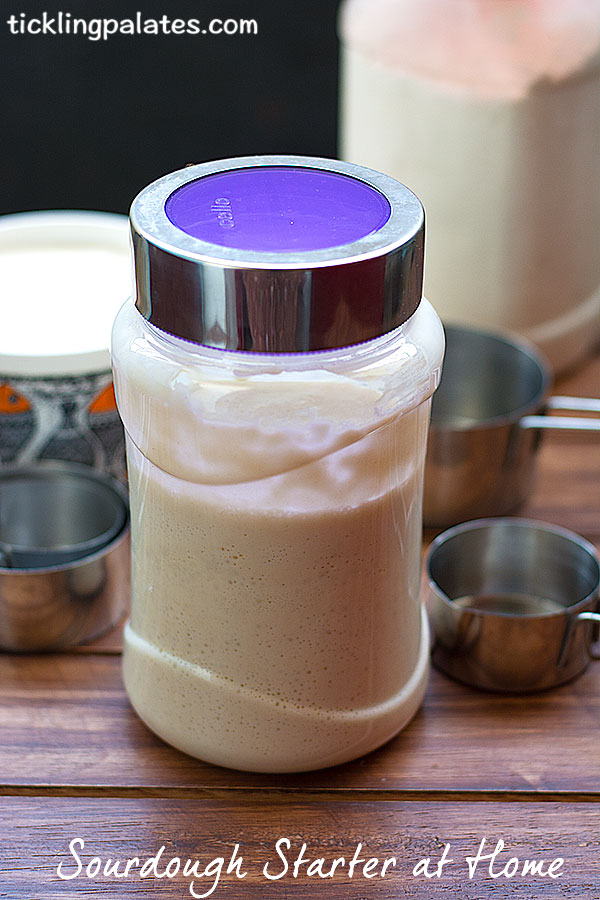
What container to use:
You can use ceramic, glass, stainless steel and food grade plastic containers. I did not want to use the former 2 as they would need careful handling. I used a 1 ltr food grade plastic pet jar. It is better to use a tall jar than a bowl as it is easier to check the daily progress.
Water:
Non chlorinated water, distilled water, tap water left on counter overnight….. Again too much information. I get drinking water door delivered in bottled cans. If I can survive drinking that, I decided the sourdough can too. So, I used the same. If you are still doubtful buy a bottle of packaged drinking water. Water used was at room temperature.
Flours to use:
All the recipes started with whole grain flour. You can also use any gluten free flour but I did not want to get too greedy. So I used whole wheat flour (atta) to kick start the starter and then switched to all purpose flour (maida).
How to measure flour:
Scoop flour from the bin into the measuring cup till its full. Swipe a sharp end of the knife across the cup to level the cup.
Overall consistency:
Though its called as a sourdough, its more like a thick batter. It should be firm and definitely not of a soup consistency. It should be thick like a pancake or idli batter easy enough to scoop out.
If you follow the measurements it will be of perfect consistency but if at any point of time, you find it very thin, then while feeding either add 2 tbsp of extra flour or reduce 2 tbsp from the water. No harm will be done.
Sourdough Starter Process with stepwise photos:
Day - 1: Sunday - 6 a.m
In the jar that you are using, add 1/2 cup whole wheat flour and 1/3 cup water. Combine by stirring briskly till you don’t see any dry patches of flour. The consistency will be of a thick lump. Rest for 24 hours.

Do not close the jar tightly with its lid. The starter needs air to breathe. You can either place the lid turned over on top of the jar leaving just a crack open or place a cheese cloth or kitchen paper over the mouth and secure it with a rubber band.
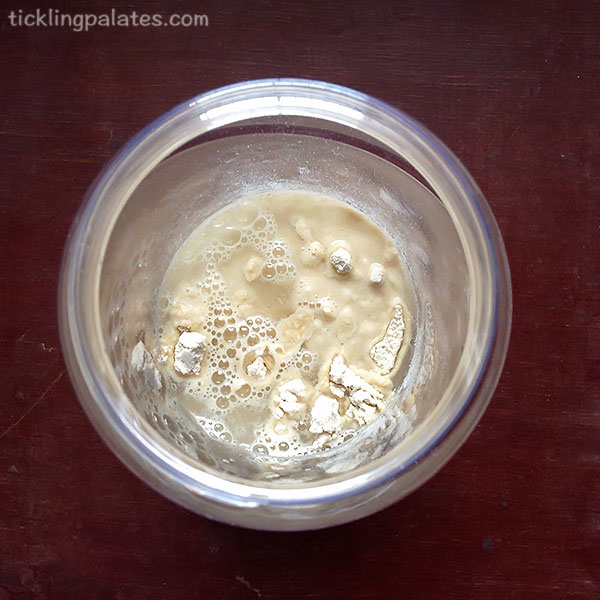
Day - 2: Monday - 6 a.m
Today will be the first day of discarding and feeding your starter.

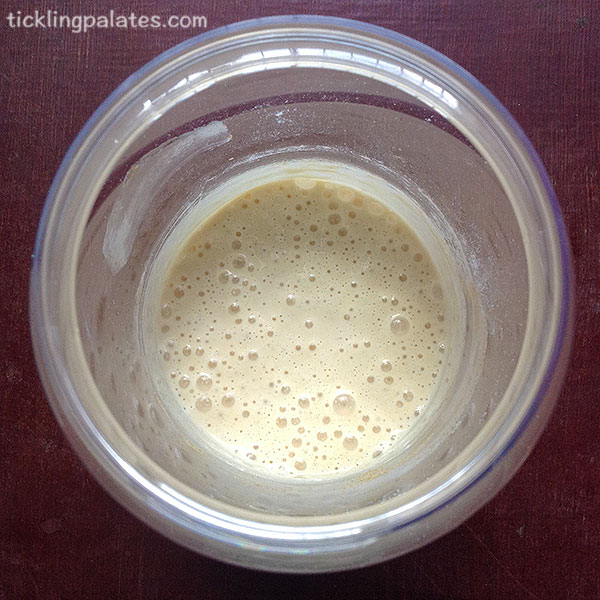
When I removed the lid, I saw that the surface all cracked up with pores and bubbles large and small.

The sides around the jar were full of pores - big and small. The volume though not doubled has certainly grown a little in height.
Discard:
Stir the starter well using a clean spoon.
Put 1/4 quantity measuring cup inside the jar and gently scoop the thick batter and discard it.
Feed:
From now on, we will only be using all purpose flour, which will be mentioned as flour from now on.
After discard, add 1/2 cup flour followed by 1/3 cup water. Stir briskly till you don’t see any dry patches of flour. Rest for 24 hours.
Day - 3: Tuesday - 6 a.m
From today, you will be following the process of discarding and feeding twice a day. First at 6 a.m in the morning and after 12 hours at 6 p.m in the evening.
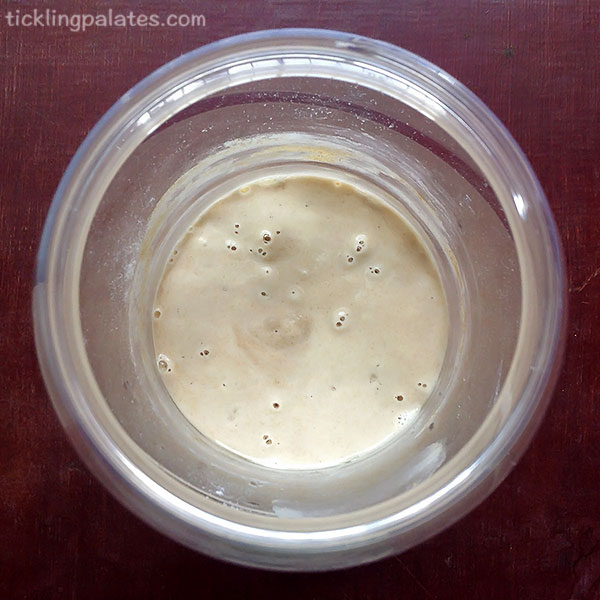
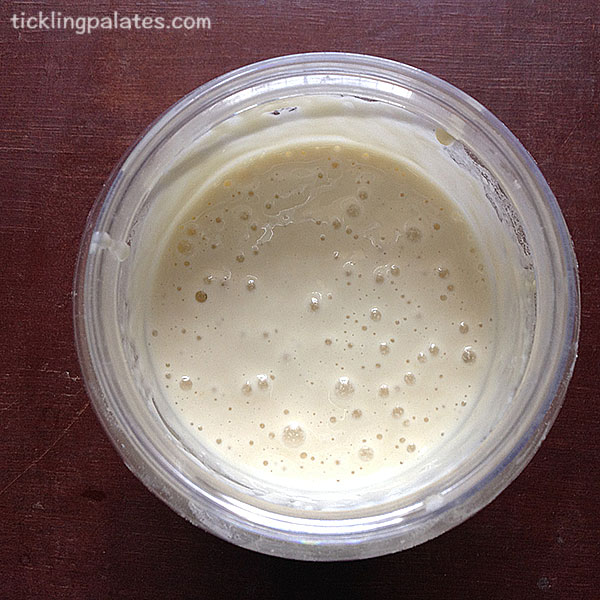
When I opened the lid, the surface had tiny bubbles here and there. It was not that full of cracks and pores like it was on Day 2. The starter was losing out the light yellow color from the whole wheat flour.
There were tiny pores around the sides unlike the bigger ones as on the day-2. This is how it will look from now on.
If you do not see any bubbles on top, not to worry because they are all hiding below the surface. Stir briskly and wait few seconds and you can see all the bubbles on top, telling you that the starter is indeed alive and busy.
Discard:
Stir the starter well using a clean spoon.
Put 1/4 quantity measuring cup inside the jar and gently scoop the thick batter and discard it.
Feed:
After discard, add 1/2 cup flour followed by 1/3 cup water. Stir briskly till you don’t see any dry patches of flour. Rest for 12 hours.
Repeat the discard and feed process at 6 p.m.
Day - 4 & Day - 5 : Wednesday & Thursday
Follow the discard and feed procedure twice a day. Once at 6 a.m and again at 6 p.m
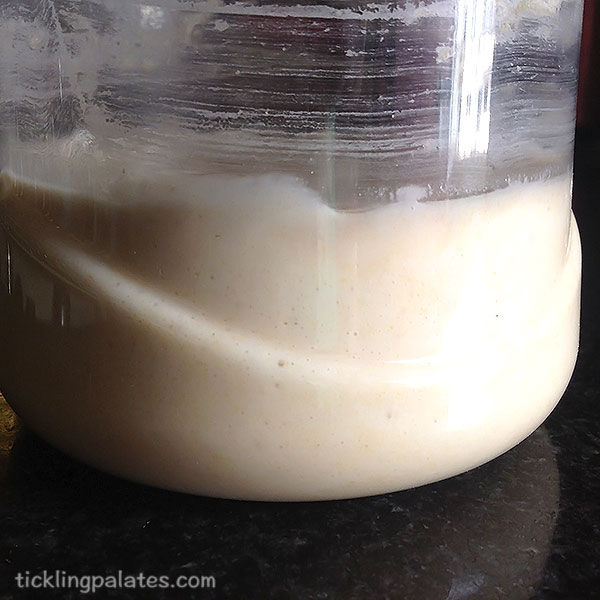
Day - 6 : Friday 6 a.m
Your starter is almost ready and today will be last day of doing discard and feed twice.
After stirring, you can the see the surface is full of bubbles.

The sides will have tiny pores and bubbles and as you can see the starter is almost more than half the jar now.
Follow discard and feed.
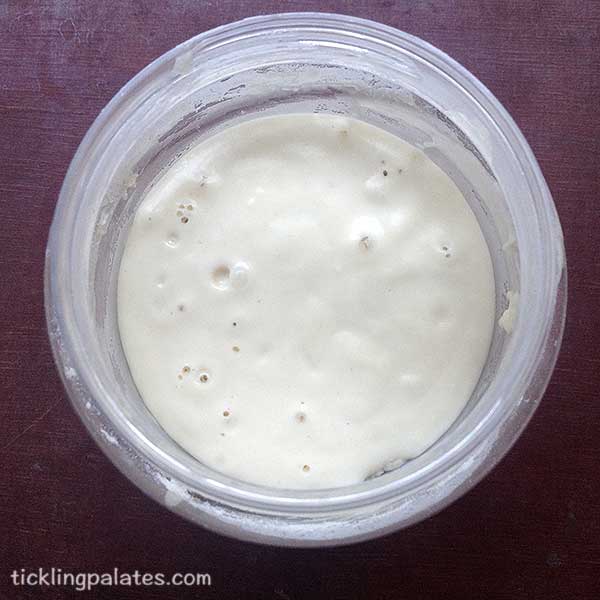
You can say that your starter is ready when you check the surface of the jar after 4 or 5 hours. You can see little bubbles on the top and more bubbles just waiting to rise underneath the surface.
Repeat the discard and feed as usual at 6 p.m again.
Day - 7 : Saturday 6 a.m
Your starter is ready and today we will give it a final feeding and move it to a permanent home.

When I removed the lid, the surface was full of tiny bubbles and rivulets making the dough to look as it is trying to get folded inside.
You can actually sniff the sourness. It will smell like vinegar with a hint of fruit. I felt it smelled more like grape juice left for several hours at room temperature.

The volume has certainly increased and starter is now almost reaching the top of the container. There are tiny to moderate pores all around the sides of the jar.

Stir the starter briskly. The bubbles on top will look definitely bigger now.
Giving you sourdough starter a permanent home:
I used a tupperware container for easy handling. You can also use ceramic or glass jar for your starter’s permanent home.
Stir the starter briskly. Measure 1 cup of the batter and transfer it to your permanent jar that you are using. Discard the rest.
Add 1 cup flour. Add 1/3 cup water twice as you have doubled your feeding quantity. Stir well till you do not see any dry patches of flour.
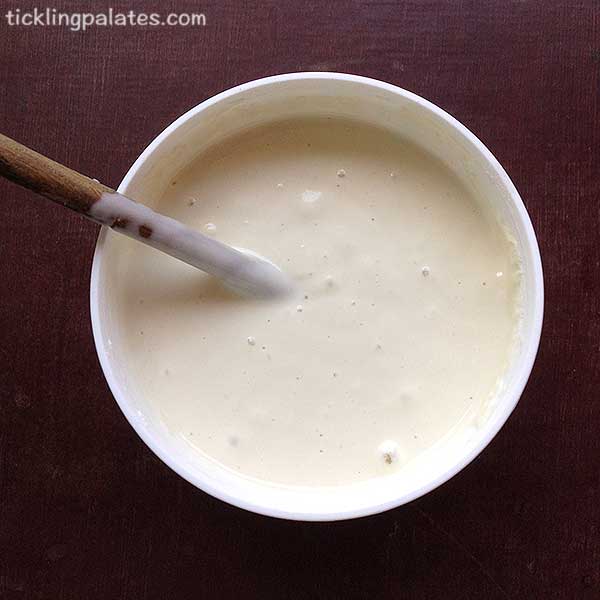
Give it a few seconds and you can see tiny bubbles trying to form on top.
Let it rest for 4 to 6 hours. Just place the lid on top and do not close the jar tightly.

When you take a peek after 6 hours, the surface will be full of tiny bubbles.
Your starter is now fully mature. Cover the jar loosely with its lid. You can also wrap the mouth with a plastic wrap or kitchen paper securing with a rubber band.

Refrigerate this sourdough starter. Use as and when required after letting it thaw to room temperature. After taking out enough starter for your use in a recipe, feed the starter left over in its permanent jar, rest for 6 to 8 hours before refrigerating it.
And since, you made this sourdough baby right from scratch, do you know that you can also name your starter? I have named mine Ms.Bubbles as this little one gave me so much joy from day 1.
You need to feed this starter every week on any chosen day that you are free to keep your sourdough starter active and alive. Meanwhile check out these recipes that are made using sourdough,
Sourdough Naan (on stove top)
Sourdough Eggless Oatmeal Raisin Muffins
DID YOU TRY THIS RECIPE?
Share it on Instagram, tag @ticklingpalates and hashtag it #ticklingpalates or you can also share it on ticklingpalates FB Page.
Sourdough Starter recipe details below:

Sourdough Starter Recipe
Ingredients:
To start the sourdough starter:
- Whole wheat flour - 1/2 cup
- Drinking water - 1/3 cup
To feed the starter:
- All purpose flour - 1/2 cup
- Drinking water - 1/3 cup
Instructions:
Day 1:
- In your chosen container combine whole wheat flour and water. Stir briskly till there are no dry patches of flour left. I used food grade plastic jar. You can also use glass, ceramic and stainless steel containers.
- Close the jar loosely with lid and let it rest for 24 hours.
Day 2:
- Stir briskly. Discard 1/4 cup starter from the jar.
- Feed the starter by adding all purpose flour and water and once again stir well till there are no dry patches of flour left.
- Let it rest for 24 hours.
Day 3:
- There will 2 feedings from now every 12 hours.
- For each feeding stir well, discard 1/4 cup of starter from jar.
- Feed the starter by adding all purpose flour and water and once again stir well till there are no dry patches of flour left.
- Cover loosely and rest for 12 hours and repeat the same process.
Day 4,5 & 6:
- Follow the same process of discarding and feeding every 12 hours twice a day like you did on Day 3.
Day 7:
- Your starter is ready when you see volume almost doubled, lots of little bubbles and the surface looking like its going to cave underneath.
- Stir the starter well. I used a tupperware jar for its permanent home. Again you can use glass, ceramic or stainless steel for its permanent home.
- Measure 1 cup from the jar and transfer to the tupperware jar. Feed it by adding 1 cup flour. Measure and add 1/3 cup water 2 times. Discard the rest of the starter or use it in a recipe.
- Stir briskly till there are no patches of dry flour left.
- Let it rest for 4 to 6 hours. After 6 hours you can see surface is full of little bubbles.
- Store this starter in the refrigerator.
- You need to feed this every week on any chosen day that you are free to keep your sourdough starter active and alive.
Gagandeep Singh
I just started baking about a couple of months ago and have been very lucky in my ventures so far. I have been following the recipes at KAF and this post wonderfully augmented their sour dough starter recipe. The pictures for each day were a great help in setting the right expectations for each day.
Today is the 5th day and when I woke up in the morning, found that my starter is full of bubbles and more than doubled in volume. I am planning to give it one last feed today and then refrigerate it tomorrow (on day 6). I hope a day earlier won’t be a problem.
Extremely excited to make the actual bread tomorrow. Thanks again for the wonderful post.
Hi, I know how exciting it is to peep into the bottle early in the morning to see the froth and bubbles. Good luck with baking with your sour dough starter.
Helene
Hello from Goa, India
Total newbie to sourdough… but bake wholewheat everyday…
I am on day 5 of my atta starter - made crumpets with the discard this morning which worked really well. Because I live in a hot humid climate I think my starter came together very quickly and without too much bother. I was not very good at the prescise timings or measurements as I cook from sight and taste. However it is very much alive! Tonight or tomorrow I think I will transfer to a permanent home. My question is is it ok to have a sealed container in the fridge or does it have to be loose, in which case what is best that isnt going to spill all over an over croweded fridge! (Before you say get another fridge I have 3 - the climate calls for fridges doubling as pantries!!!)
sucheta khushalani
Hi, Thank you so much for such a detailed explanation. Today is day 5 of my sourdough starter, Slight vinegary smell is there but no substantial rise in volume or bubble formation.
Do I shift it to a warmer place?
In Pune it is quite hot, may b the kitchen is not that warm or do I start all over again.
Hi, shift it to a warmer place or place it on top of the refrigerator for the much needed warmth. it always works for me.
Gagan
It can not be more descriptive. Excellent post.
I was just going through many videos for making sourdough, but was not sure with Indian climate. Your article gave me confidence that it can be done.
And making measurement very simple is another good thing you have done.
Thanks,
Gagan
Hi…so happy to hear that you found it useful.