


Making Curd (Yogurt) at home is an everyday chore in any Indian home and quite easy too. Homemade Yogurt (Curd) is always healthier and cheaper than the store bought ones and best in terms of flavor, freshness and taste. Usually we need a starter to make/set fresh thick curd which happens to be the left over curd from the previous day. But how to make curd if you do have any curd/culture at hand. You will be surprised at how easy it is to make yogurt at home from scratch without any fancy equipments/machine or candy thermometer to check the temperature of milk yet being able to make fresh homemade yogurt, day after day and enjoy reaping the health benefits by making it a part of your daily diet.

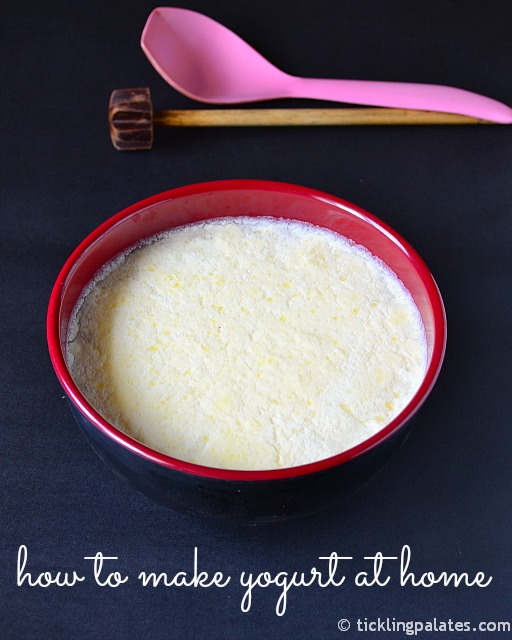
Homemade Yogurt (Curd)
Prep time: 5 mins | Cook time: Nil | Setting time: 5-7 hours | Makes: 2 Cups
Recipe Cuisine: Continental | Recipe Category: Basic
Recipe Cuisine: Continental | Recipe Category: Basic

Ingredients:
For the Starter:
- Milk – 1/4 cup
- White Vinegar – 1/8 tsp
- Salt – 1 pinch
For the Curd / Yogurt:
- Whole Milk – 2 cups
- Starter – 3 to 4 tbsp
Instructions:
- Heat 1/4 cup milk in a bowl. I usually Microwave at high for 10 secs.
- Add vinegar, salt and mix well. Close with lid and let it be for 8 to 10 hours. This is our culture. We must let it rest because the culture needs to turn slightly sour and pungent as that helps the yogurt to be more flavorful else your yogurt will smell and taste like spoilt milk.
- Place the starter in a bowl in which you are going to set curd and swirl the bowl. Let the starter coat the inside of the bowl well, all around.
- Pour the milk into the bowl. No need to stir/mix. Close with a lid and let it rest for 5-7 hours.
- Homemade fresh and thick yogurt is ready to be used as you wish. Reserve a little yogurt before using to make another fresh batch for the next day.
- Always store the set yogurt refrigerated and use it within a week. Remember to reserve a little yogurt at last to make another fresh batch.
Our Favorite Video:
Tips & Tricks:
- Using whole milk will give you thick yogurt while using 2% milk will result in a thinner one.
- There is no need to heat milk before setting it (Step 4) if the milk is in room temperature. If it is cold, microwave it for 2 minutes. That heat would be exact.
- I live in a tropical place where it is always hot, so adjust the hours according to the temperature of the place you live in.
- If you want to set Yogurt during winter season, it may be a bit challenging due to the drop in temperature. During those times and if you want to set yogurt quicker, heat the milk and use a hot pack or a thermos ware for setting.
- You may at times see whitish water on top of yogurt, which is just water content in the milk. You can discard it or mix it along with yogurt and use as it is perfectly safe.
- For a more thicker yogurt / curd, place a cheese cloth or a multiple folded muslin cloth over a strainer and set it on bowl. Dump the set yogurt into the cloth and place the bowl in the Refrigerator. All the water will be collected in the bowl and you can use the thick yogurt left over in the cloth as you prefer.
- Instead of discarding, you can use the water thus collected in the bowl as a starter for your next batch of yogurt.


Thank you for posting this! I am very excited to try it!
Thank you for posting this it is very well written & I love the simplicity of the instructions 🙂 I can’t wait to try this!
Hi, thanks for the lovely post, I’m super excited about trying it this way i.e. without a starter or excessive temperature control (I’m in the tropics as well). One question though, do you think this would work with other kinds of vinegar, such as apple cider vinegar? Thanks again.
elsa
Hi
Should the milk be hot when adding the vinegar and salt ?
Elsa, the milk should be warm to your touch. Hope this helps.
Susan
Looking forward to try yoghurt from scratch - does it matter if I use metal utensils, and after my 1st batch can I just leave a small amount of yougurt from my starter in the bowl and top up with milk or do I always have to use a new bowl for the next batch, how do I tell if I have done it wrong and make sour milk ( eg: the yoghurt did not work)?
You can always leave a little starter and then add warm milk to the bowl to set the curd. You can also change to a new bowl after 3 or 4 times. Using a new bowl every time is your choice but not necessary.